How to Check Your Wiring Harness: A Comprehensive Guide

When dealing with any electrical or automotive system, the wiring harness is one of the most critical components. If it malfunctions, you could experience a wide range of issues, from minor electrical glitches to complete system failure. Regular checks of your wiring harness ensure that everything is functioning properly, keeping your systems safe and efficient.
In this guide, we’ll cover how to check your wiring harness in a thorough and straightforward way. Whether you’re a beginner or experienced, this step-by-step approach will help you inspect, diagnose, and maintain your wiring harness to avoid costly repairs or breakdowns.
Why Is It Important to Check Your Wiring Harness?
The wiring harness is responsible for delivering electrical power and signals to various components in your system, whether it’s in a car, a piece of industrial machinery, or a home appliance. Without regular inspections, small issues like a loose connection or frayed wire can snowball into bigger problems.
For example, in an automotive system, a damaged wiring harness can lead to engine failures, dashboard errors, and even safety hazards like electrical fires. In industrial equipment, faulty wiring can cause downtime, loss of productivity, and increased maintenance costs. Regularly checking your wiring harness can help avoid these problems by identifying and fixing potential issues early.
Tools You Need to Test a Wiring Harness
Before jumping into the testing process, it’s important to gather the right tools. Testing your wiring harness is straightforward with a few essential instruments.
Multimeter
A multimeter is a must-have tool for wiring harness testing. It helps you measure voltage, continuity, and resistance. There are two main types: digital and manual. Digital multimeters are easier to read and are more beginner-friendly, while manual multimeters can be more cost-effective.
Voltmeter
A voltmeter is used specifically for testing the voltage across different parts of the wiring harness. This helps detect any drop in voltage that could indicate an issue in the wiring.
Continuity Tester
This tool helps you check whether electricity can flow through the wires, ensuring no breaks in the circuit. A continuity test is often one of the first things you do when testing a wiring harness.
Visual Inspection Tools
A flashlight, magnifying glass, and wire stripper are great tools to visually inspect the condition of the wires and connectors. These will help you detect any obvious wear and tear or damage to the insulation and connectors.
Step-by-Step Guide to Checking Your Wiring Harness
Checking your wiring harness is a multi-step process that requires both visual and electrical testing. Here’s how to proceed:
Step 1: Perform a Visual Inspection
Start with a thorough visual inspection of the wiring harness. Look for any obvious signs of wear and damage, such as:
- Frayed wires
- Exposed insulation
- Burnt spots on the wiring
- Corrosion on connectors
- Broken or loose pins
Pay extra attention to areas near connectors, as these are common places for damage to occur. Moisture can sometimes find its way into these connections, leading to rust or corrosion that could cause electrical failures.
Step 2: Continuity Testing
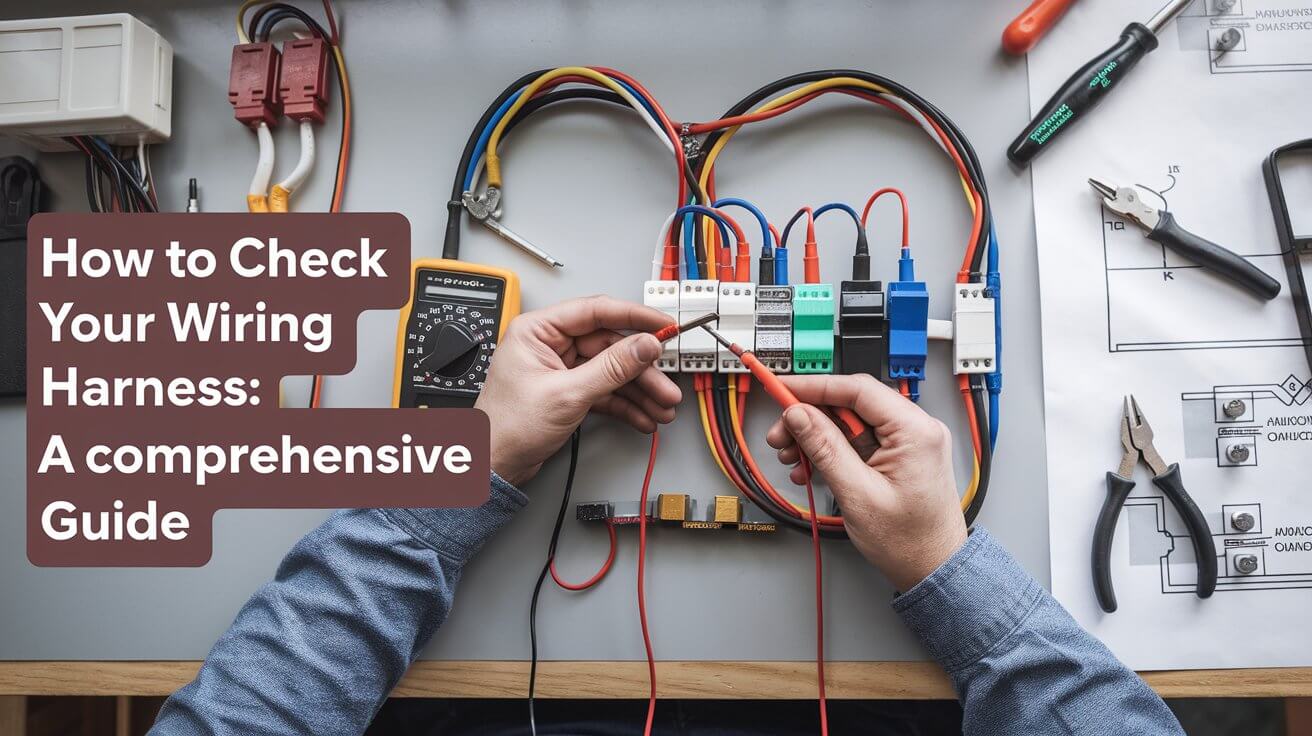
Once you’ve visually inspected the harness, it’s time to perform a continuity test using your multimeter. Set your multimeter to the continuity setting and place the probes at each end of the wire you’re testing.
- If the multimeter beeps or shows a low resistance reading, the wire has continuity, meaning the electrical connection is intact.
- If there is no sound or a very high resistance reading, it indicates an open circuit, meaning the wire is broken and needs to be repaired or replaced.
This test is especially useful for identifying breaks in the wiring that aren’t visible during a visual inspection.
Step 3: Voltage Testing
After checking for continuity, use your voltmeter to perform a voltage test. This ensures the wiring is delivering the correct amount of voltage. Here’s how:
- Switch the voltmeter to the DC voltage setting.
- Attach the negative lead to a ground source and the positive lead to the wire or connector you want to test.
- Turn on the power to the system and observe the voltage reading.
The voltage should match the expected value for the circuit you’re testing. If the voltage is too low, it may indicate a wiring issue such as a loose connection or excessive resistance.
Step 4: Insulation Resistance Testing
Insulation resistance testing is crucial for determining whether the wiring insulation has degraded. Insulation is key to preventing short circuits and maintaining the longevity of the wiring harness.
To perform this test:
- Use an insulation resistance tester, also known as a megohmmeter.
- Connect the tester to one end of the wiring and a ground point.
- Apply the appropriate test voltage as per the specifications of the wiring system.
If the insulation resistance is below the recommended level, this could indicate that the insulation has been compromised and may need to be replaced.
Step 5: Wiggle Test
Sometimes, intermittent electrical problems arise when wires are moved or shaken. To detect these, perform a wiggle test:
- While monitoring the circuit with a multimeter, gently wiggle the wiring harness.
- If you see fluctuations in the readings or the circuit cuts in and out, this could indicate loose connections or internal wire breaks.
This is particularly useful for catching issues that don’t show up during static tests.
Common Issues Found in Wiring Harnesses
During your inspection and testing, you might encounter several common issues. Here’s what to look out for and how to handle them:
Loose or Damaged Connectors
Loose connectors can lead to poor electrical contact and intermittent power delivery. Tighten any loose connections and, if necessary, replace damaged connectors.
Corrosion or Rust
Moisture is the main cause of corrosion, especially in connectors and pins. If you notice corrosion, clean the area using an electrical contact cleaner and consider applying a protective coating to prevent further damage.
Frayed or Burnt Wires
Frayed wires can result from wear and tear over time, while burnt wires often indicate an electrical overload or short circuit. In either case, it’s important to replace the damaged wires to prevent further issues.
Electrical Shorts and Open Circuits
Short circuits occur when wires touch each other or a ground surface, while open circuits happen when there’s a break in the wire. Both can cause your system to fail. Identify the problem areas using your multimeter, and repair or replace the affected wires.
How to Use a Multimeter to Check Your Wiring Harness
The multimeter is your go-to tool for wiring harness testing. Here’s how to use it for different tests:
Testing for Continuity
Set your multimeter to continuity mode and connect the probes to both ends of the wire you want to test. A beep or a low resistance reading indicates the wire is continuous and not broken.
Measuring Voltage
To measure voltage, set your multimeter to the DC voltage setting. Attach the negative probe to a ground source and the positive probe to the wire. The voltage reading should match the system’s expected output.
Checking for Amperage
If you suspect the wiring harness is delivering too much or too little current, switch your multimeter to the amperage setting. This will help you detect any abnormal current flow that could indicate a problem.
Safety Precautions When Testing Wiring Harnesses
Safety should always be a priority when working with electrical systems. Here are some key safety tips:
- Turn off power: Always disconnect the power before beginning any tests to avoid electric shock.
- Use insulated tools: Ensure all your tools are rated for the voltage you’re working with and have proper insulation.
- Wear protective gear: Insulated gloves and safety glasses are essential when working with electrical systems.
By following these precautions, you can safely check and repair your wiring harness without putting yourself at risk.
When to Replace a Wiring Harness
In some cases, a wiring harness can’t be repaired and needs to be replaced. Here are some signs that replacement is necessary:
Signs of Irreparable Damage
If the wiring is severely damaged, burnt, or cut, it’s best to replace the entire harness rather than attempt patchwork repairs. This ensures long-term reliability.
Aging Harnesses
Over time, the insulation and connectors in a wiring harness may degrade due to exposure to heat, moisture, and other environmental factors. An older harness is more likely to develop issues, so replacing it can prevent future problems.
Persistent Electrical Issues
If you’ve tried repairing your harness but electrical issues keep reoccurring, it may be more cost-effective to replace the entire harness rather than continue troubleshooting.
Tips for Maintaining Your Wiring Harness
Regular maintenance is key to extending the life of your wiring harness. Here are a few tips to keep it in top condition:
- Perform regular visual inspections: Look for signs of wear and damage at least once a year or whenever you perform maintenance on your system.
- Keep it clean and dry: Moisture is the enemy of electrical components. Make sure your wiring harness is free from water, dirt, and debris.
- Use protective coverings: In areas where the harness is exposed to sharp edges or high wear, use protective tubing or wraps to prevent damage.
By following these maintenance tips, you can prolong the life of your wiring harness and avoid costly repairs down the road.
Frequently Asked Questions (FAQs)
How Often Should You Check a Wiring Harness?
It’s recommended to check your wiring harness every 12-24 months, depending on the environment it’s used in. Harsh environments, such as those with high moisture or heat, may require more frequent checks.
Can You Test a Wiring Harness Without a Multimeter?
While a multimeter is the most reliable tool, you can perform basic visual inspections and use a simple continuitytester or light bulb tester to check for continuity. However, a multimeter provides more accurate results and can help diagnose a wider range of issues, such as measuring voltage and resistance, which a basic continuity tester cannot.
What Happens If a Wiring Harness Is Faulty?
A faulty wiring harness can lead to a wide range of issues, from minor electrical glitches to complete system failure. In automotive systems, it could result in dashboard warning lights, engine problems, or even safety hazards like fires. In industrial or home systems, it could cause equipment malfunctions, downtime, or pose electrical hazards.
Conclusion
Ensuring that your wiring harness is in good condition is crucial for the safety and performance of any electrical system. By performing regular inspections, testing with tools like multimeters and voltmeters, and addressing issues like corrosion, frayed wires, and poor connections, you can prevent larger problems from arising.
Following the steps outlined in this guide will help you maintain a healthy wiring harness, extending the life of your electrical system and saving you time and money on costly repairs down the road. Whether you’re conducting simple visual checks or performing more advanced tests, consistency is key. Don’t wait for problems to appear — make checking your wiring harness part of your regular maintenance routine.


