Decode Ford’s 4 Pole Starter Solenoid Wiring Diagram Once & For All
Have you ever turned the key in your Ford’s ignition and been met with an ominous click instead of a comforting engine roar? Or maybe the starter motor lazily cranks the engine without actually firing it up? If so, faulty wiring on the 4 pole starter solenoid may be the culprit.
But what exactly should the terminal and wire connections look like on one of these solenoids to work properly? Read on for a complete breakdown.
In this comprehensive guide, we’ll cover everything you need to understand, diagnose, and repair 4 pole starter solenoid wiring issues on Ford vehicles. Here’s what we’ll tackle:
- The role of starter solenoids and how they engage your starter motor
- Ford starter solenoid terminal ID and functions
- Correct wiring diagrams by pole/terminal
- Step-by-step diagnosis and troubleshooting procedures
- Common miswiring problems and their solutions
- Specific fixes for Mustang, Bronco, and 1986 truck models
- When it’s time to just replace the faulty solenoid
So if you’re ready to get rid of that stubborn no-crank or slow crank problem once and for all, let’s get wiring!
Starter Solenoid Basics – What Exactly do These Things Do?
Before jumping into wiring diagrams, it’s helpful to understand exactly what the starter solenoid does and how it operates.
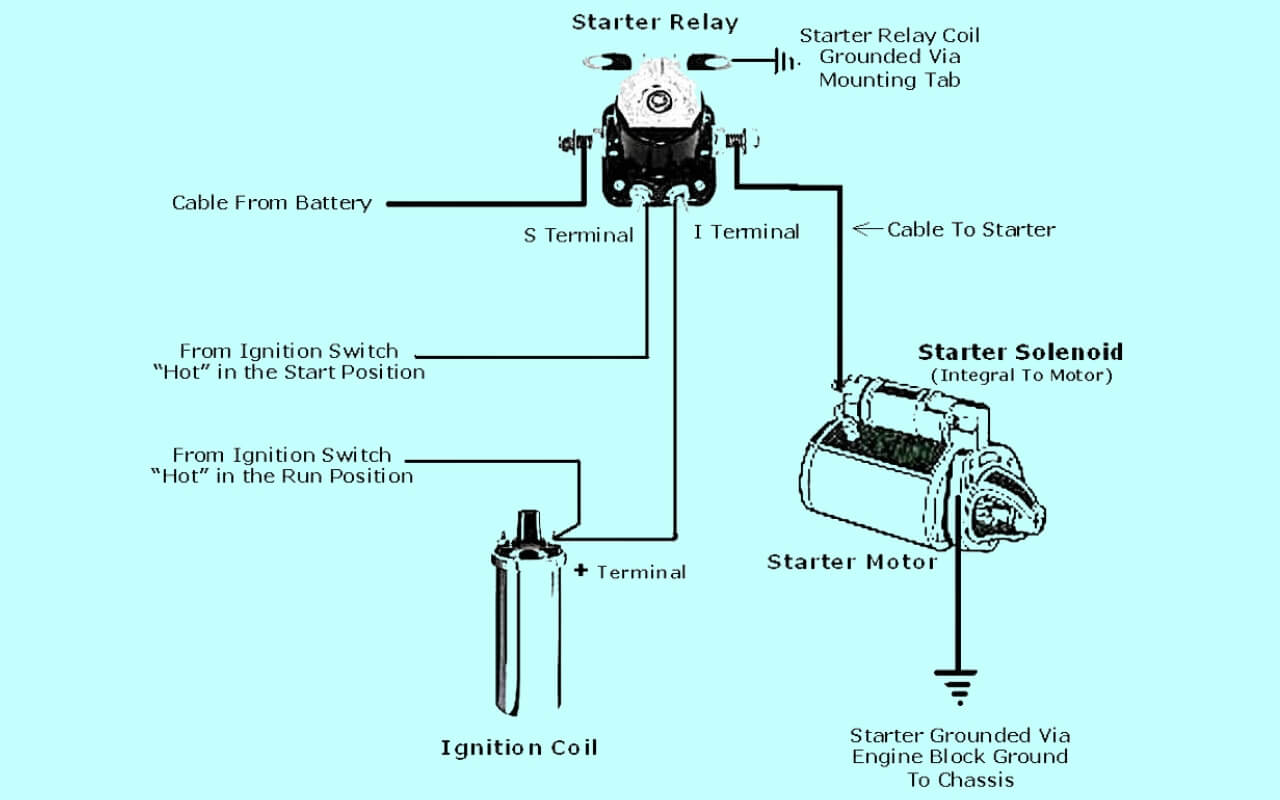
The starter solenoid is essentially a large relay switch that uses a small current to control a higher electric current, in this case, the current flowing to the starter motor. It serves as an intermediary between your ignition switch and starter.
When you turn the key to the start position, voltage flows into the small START terminal on the solenoid, powering up an internal electromagnet coil. This creates a magnetic field that physically pulls the solenoid plunger inward, closing high current contacts that send electricity to the starter.
The massive electric current delivered straight from the battery to the starter engages the starter drive gear with the flywheel, ultimately cranking the engine.
So in essence, that clicking noise you hear but lack of crank when you turn the ignition key relies on the solenoid doing its job properly. A faulty solenoid suffering from issues like corroded wiring, contact wear, or resistance in the coil windings can fail to engage the starter even if the motor itself is fine.
While a number of Ford vehicles use traditional single pole solenoids, many utilize modern 4 pole solenoid designs that incorporate additional terminals for bypassing resistance in the coil. This improves cranking power and allows simultaneous charging system excitation.
Identifying the Terminals on a 4 Pole Starter Solenoid
Unlike basic 1, 2, or 3 pole units, 4 pole solenoids contain multiple terminals or studs, each serving distinct functions. Properly identifying and understanding the role of each terminal is key to wiring everything correctly.
Here is a brief overview:
“S” or Start Terminal – The small terminal that carries a low current signal from the ignition switch to actuate the electromagnets and pull in the solenoid plunger. Typically accepts 18 or 16 gauge wire.
Large “BAT” or Battery Stud – Main large power output terminal that supplies the high current from the battery to the starter motor. Usually 1/0 or 2 gauge wire size.
Small “IGN” or Ignition Stud – Feeds current to the ignition system/coil when cranking, allowing spark. Wire is generally 14 or 12 gauge.
“C” or Coil Terminal – Provides unresisted power to one side of the internal solenoid coil, bypassing the ballast resistor. This gives full 12 volt power to the coil for maximum magnetic field strength. Typically a 12 or 14 gauge wire.
So in summary:
- S terminal activates solenoid
- BAT provides power to starter
- IGN enables ignition system operation
- C gives max voltage to solenoid coil itself
With the stage set, let’s move on to correct 4 pole solenoid wiring diagrams.
4 Pole Solenoid Wiring Diagrams
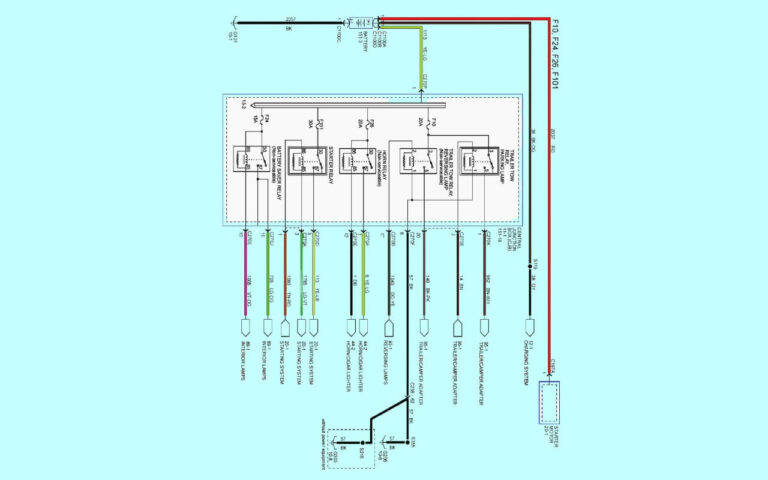
Diagram 1:
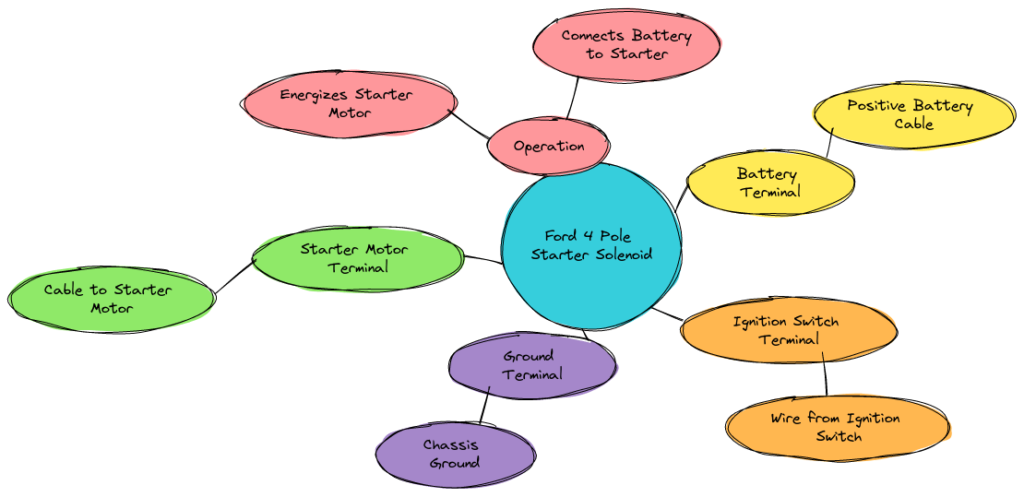
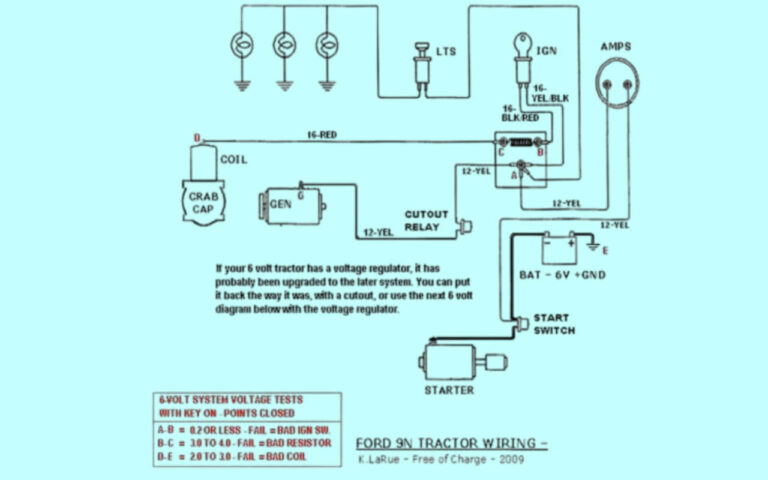
Diagram 2:

Diagram 3:

Diagram 4:

One faulty connection can mean the difference between a roaring engine and a “click… ugh” let down from your Ford.
Here are standard wiring diagrams for 4 pole starter solenoids illustrating the proper terminals and connections:
Key Components
Ignition Switch – Sends activating signal to solenoid “S” terminal
Starter Solenoid – Relay that engages starter when fired by ignition switch signal Starter Motor – Cranks engine once powered by solenoid
Battery – Powers all electric components
Ignition Coil – Provides spark to combustion process when cranking
Ignition Circuit Wiring
The ignition circuit provides power to the vehicle’s electronics and gets things firing. This feeds from the IGN/4 terminal on the solenoid.
Starting Circuit Wiring
The starting circuit transfers the huge electric current from battery to starter to crank the motor. Power transfers through large BAT/3 terminal.
Coil Terminal Wiring
Bypassing resistance allows maximum coil voltage for strongest magnetic field to pull in plunger. Diagram shows wire from battery splice or starter relay to C/1 terminal.
These diagrams should give you a reference point for connecting all terminals properly. With that foundation set, let’s go through diagnosing and correcting problems.
Step-By-Step Diagnosis of 4 Pole Solenoid Issues
Intermittent no-start problems have you tearing your hair out? This methodical diagnosis process will help identify if the 4 pole solenoid is actually the culprit, and rule out other potential causes like a bad ignition switch.
Follow these steps to pinpoint troubles:
Verify Battery Voltage
- Use multimeter to test battery state of charge
- Should show 12.4+ volts
- Charge or replace battery if low
Check Cable Condition
- Inspect battery cables and terminals
- Look for frayed wires or corroded connections
- Tighten down or replace defective cables
Test Ignition Switch
- Check for power at switch “Start” terminal
- Use multimeter or test light probe
- No power could indicate bad ignition switch
Bypass Ignition Circuit
- Use jumper wire from positive terminal on solenoid “S” terminal to battery positive
- If starter engages, focus diagnosis on switch and ignition circuit
Verify Coil Wire Connection
- Make sure coil/C terminal properly wired
- Start attempt will be weaker if bypassed
Once ignition components are verified, it’s likely an issue with the solenoid itself or the high current starter motor circuit.
Time to home in on the 4 pole unit!
Isolating 4 Pole Solenoid Problems
By systematically checking each solenoid terminal you can narrow down faults to individual components. Follow this streamlined process:
Check Small Start Terminal
- Probe terminal “S” with test light when ignition activated
- Presence of power points to adequate ignition switch signal
- No power indicates open C coil wire or faulty pull-in coil
Analyze Voltage Drop
- Attach red multimeter probe to Start terminal
- Place black probe on Battery stud
- Crank and observe reading
- Voltage loss over 0.5V can mean corroded or undersized S wire or weak pull-in coil
Bypass Solenoid
- Use heavy jumper wire from battery positive to starter motor terminal
- If starter spins normally, solenoid contacts or pull-in coil likely bad
- No crank means issue with motor or connections
These tests will help narrow down whether the solenoid coil, contacts inside the device, or wires leading to/from it are causing failure to engage the starter.
Sometimes though, tracking down a faulty component can be challenging. Let’s look at fixing common miswiring scenarios.
Common Starter Solenoid Wiring Mistakes
With multiple connections, terminals, and wires in play, improperly wiring a 4 pole solenoid is easy.
Here are some typical missteps:
Reversed Power Wires
- Positive and negative battery wires backwards
- Starter won’t work and may burn up
Loose Battery Terminal
- Corrosion or loose bolt on battery cable ring terminal
- Intermittent power causes no-crank
Faulty Ignition Switch Connection
- Burnt or disconnected “Start” position terminal
- No activating signal reaching solenoid
Missing or Wrong Coil Wire
- Not wiring separate coil power source to terminal C
- Results in weak magnetic field and failure to pull-in
Undersized Power Cables
- Using too small wires unable to carry high current
- Overheated wires that melt insulation and short
Carefully checking connections against the correct diagrams, cleaning corroded wires, and properly crimping replacement terminals should get things working again.
Sometimes though, certain Ford models see common solenoid miswiring problems. Let’s explore some quick fixes.
Ford Model Specific Wiring Fixes
Over years of servicing vehicles, automotive technicians uncover the typical failure points for certain models. Here are solenoid issues predominant on popular Fords:
1986-1993 Mustang 5.0
- Dual feed wire on Coil terminal overloaded from starter and ECU feed
- Add relay to power ECU separately
1987-1996 Bronco/F150
- Corroded battery cable ring terminals
- Remove residue, refasten, or replace terminals
1986 Ford F-Series
- Loose battery ground strap
- Secure bracket bolts and verify clean contact surface
So if you have one of these vehicles exhibiting no-start conditions, inspect and correct these specific trouble spots.
Sometimes though, the starter solenoid itself just can’t be saved, regardless of wiring.
When to Throw in the Towel and Replace the Solenoid
Despite your best efforts verifying connections, bypassing components, and fixing wiring issues, that balky starter solenoid may need to be replaced.
Here are signs it’s time to swap in a new 4 pole unit:
Excessive Voltage Drop
- More than 1 V drop during cranking indicates excessive internal resistance
- Replace solenoid
Stuck Plunger
- Plunger fails to retract and constantly engages starter
- Worn out return spring or damaged internals
Visible Damage
- Cracked housing, burnt terminal posts
- Risk of failure makes replacement recommended
Persistent No-Crank After Fixes
- Starter engages when bypassing solenoid but miswiring ruled out
- Faulty electromagnet pull-in coil or worn contacts
While a quality solenoid rebuild kit with repair parts may fix problems short term, a brand new unit ensures reliable starting performance. Identify original part numbers, hit your local parts store or online retailer for a replacement, and get to an easy install using your handy wiring diagrams.
Let’s Review – Key Takeaways
Whew, we covered a lot of ground here on wiring Ford’s 4 terminal starter solenoids!
Here’s a quick recap of the key points:
- The starter solenoid is essentially a high current relay activated by your ignition switch to turn the starter motor
- 4 pole solenoids have dedicated terminals for coil power, ignition, battery, and switch connections
- Correct wiring diagrams are essential references during diagnosis and repair
- Methodically verifying battery, switch, and individual solenoid circuits and components allows systematic isolation of no-start issues
- Simple miswiring mistakes can prevent proper starter operation
- When all else fails, replacing the starter solenoid along with fixing aged wires and connections typically gets you back on the road
While all those terminals and wires may seem intimidating, methodically addressing each one as illustrated in this post will lead you to a reliable solution.
You’ve got this – that balky engine crank will soon be a distant memory!
Now go get wrenching!

